One of the things that convinced us to move into this apartment was the washer and dryer (a hard thing to find in apartments in Overcast). They're great--really new, Energy Star, and very quiet. With all the sewing I do, it's nice to not have to schlep everything to the laundromat to pre-wash.
But they're in our bathroom, and the bathroom is tiny, so the washer and dryer is all anyone sees. Plus our extra cat litter, broom, and potting soil or whatever we've thrown in there because there's no room for it anywhere else. I've been looking for a nice curtain or even bedsheet to hang up and add some pattern while screening it off, but haven't been able to find anything nice. I took a class on dying in college, though, so I decided to shibori dye a bedsheet myself.
I used Dylon brand dye, which was easy to use, but if I had it to do over again, I think I would go with Rit or natural indigo dye. I've had good experience with Rit giving really saturated colors in the past, and natural indigo is both saturated and gives crisp lines.
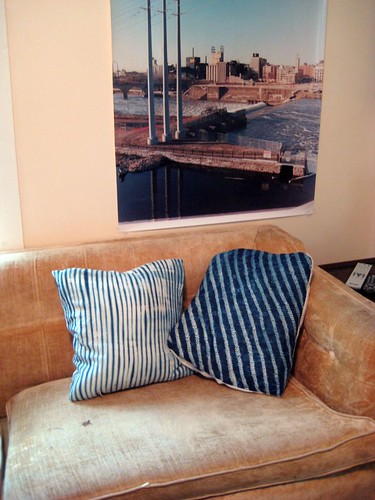 |
| One pole-wrapped and one stitched shibori throw pillow, dyed with natural indigo |
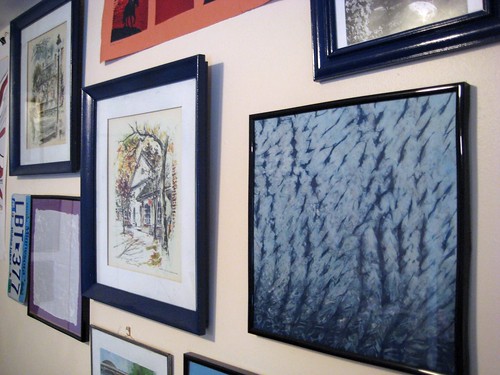 |
| Pole-wrapped and twisted shibori silk dyed in natural indigo and framed |
 |
| Dye packets, salt, kitchen twine and the sheet |
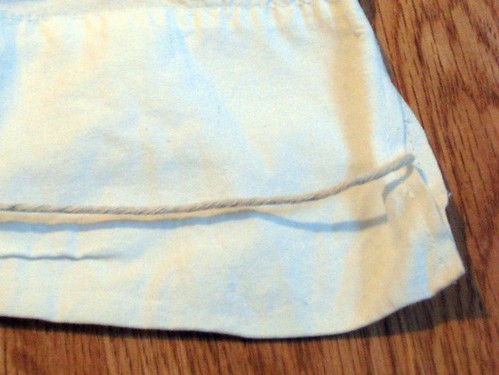 Step Two: Hem and Prep The bedsheet I used was the perfect floor-to ceiling length, so I used the sheet hem as both the curtain rod pocket and to scrunch the fabric for dying. If your fabric needs to be hemmed up or have the curtain rod pocket added, make sure to do this before dying.
 There are lots of kinds of shibori dying, but this one is a close cousin of t-shirt tie-dying. I ran a length of kitchen twine through the inside of the curtain rod pocket and down the other side. (make sure you use something strong, as this will get pulled on a lot. Don't use something like yarn or thread that will snap if you put it under a lot of tension.
 |
| Helpful kitty is helpful |
I wanted my curtain to have an ombre effect, starting dark on the bottom and getting lighter towards the top. The dye will seep into the roll of fabric and dye the fabric on the outside of the roll more dark than the fabric on the inside of the roll, so I made sure to start my rolling from the top of the curtain and end with the bottom hem wrapped around the outside of the roll. I've also seen it done with both edges wrapped into the center or vice versa, and all that takes is doing step two to both ends of the curtain.
Two things to remember no matter which way you're rolling it: keep the edges neat, and keep the two lengths of twine run through the pocket in step two together and in the center of the roll.
Once you've got your fabric rolled up, take 6-8 inch lengths of twine and tie one around your fabric roll about every 4-5 inches. Only tie them tight enough to keep the fabric from unrolling. I used about thirty pieces of twine for a Queen size sheet.

Step Four: Scrunch! Find the two inner pieces of twine, the ones threaded through the curtain rod pocket, and take a hold of the free ends. Get a good grip on them, and push the fabric log together towards the other end. It should gather up like the photo above. Scrunch your fabric, and then scrunch some more, because the tighter you compress it the crisper the contrast on the finished curtain will be. Pushing the fabric together like this keeps the dye from penetrating some parts of the fabric in a controlled pattern. Tie off the two free ends of twine securely to keep your scrunched fabric sausage from relaxing in the dye bath. I also cut off the excess twine to keep it from getting in the way.

Step Five: Dye The Dylon packets, like I mentioned above, are dissolved in hot water with 4TBSP of salt per packet of dye. Make sure to dissolve your dye and salt in the water BEFORE adding your fabric--trying to dissolve the dye with the fabric already in the water will result in little particles of undissolved dye sitting on your fabric and dying it unevenly. Stir with a dedicated spoon--one that will never again be used on food, or with gloved hands. Some dyes contain carcinogens, and all will dye your hands and nails for at least a day or two. Not that I found that out the hard way and once had corpse-blue hands for a week or anything.
I dye in a plastic storage tub, rather than in the tub or sink directly. We rent and have an old enameled cast iron tub, and dye will stain tubs, especially if the enamel is even slightly worn. I've never dyed in a plastic lined bath tub, and although I've never had one of my plastic storage bins stained by dye, I wouldn't dye in anything I couldn't stand staining just to be safe.
Also before adding your fabric to the dye bath, take your fabric sausage and get it good and wet, making sure that the roll is wet all the way to the center. This helps keep the contrast of the scrunching crisp also, as the water already in the folds will keep the dye from penetrating the fabric as easily.
Step Siz: Wait The Dylon packet called for the fabric to stay in the dyebath for an hour. Because my fabric floated, and I wanted even coverage, I flipped it every fifteen minutes.
When your hour is up, pour the dye bath down the drain and carefully snip all your twine ties. Squeeze as much dye out of your fabric roll as you can, then unroll and throw it into the washing machine on cold rinse with no detergent.
If you got dye on your tub (which is kind of unavoidable), wipe it down with a bleach solution on a sponge as soon as you can. It will stain if you leave it to sit, but it shouldn't stain if you get it quickly.
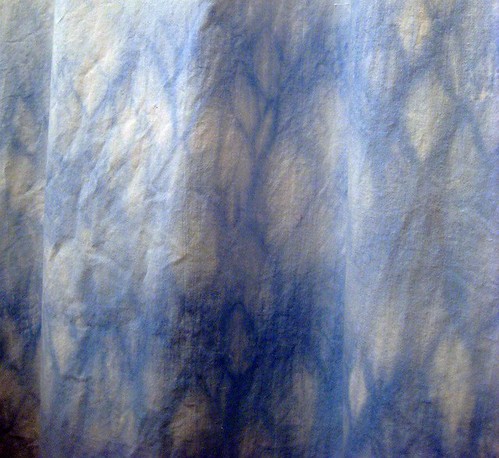
After washing, dry the fabric in the dryer like normal. I had to iron mine as well since it was crinkled from where it was tied and scrunched. Hang and enjoy! I could also see doing this for window curtains or for yardage for a dress or other project. I'm a big fan of blue and white, but overdying on a colored fabric could also have pretty results.
 |
| Before |
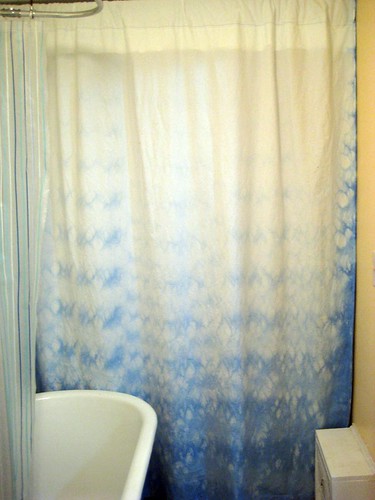 |
| After |
No comments:
Post a Comment