Showing posts with label reupholstery. Show all posts

Saturday, April 16, 2011

All Sewn Up; Or, a Philosophy of Reupholstery


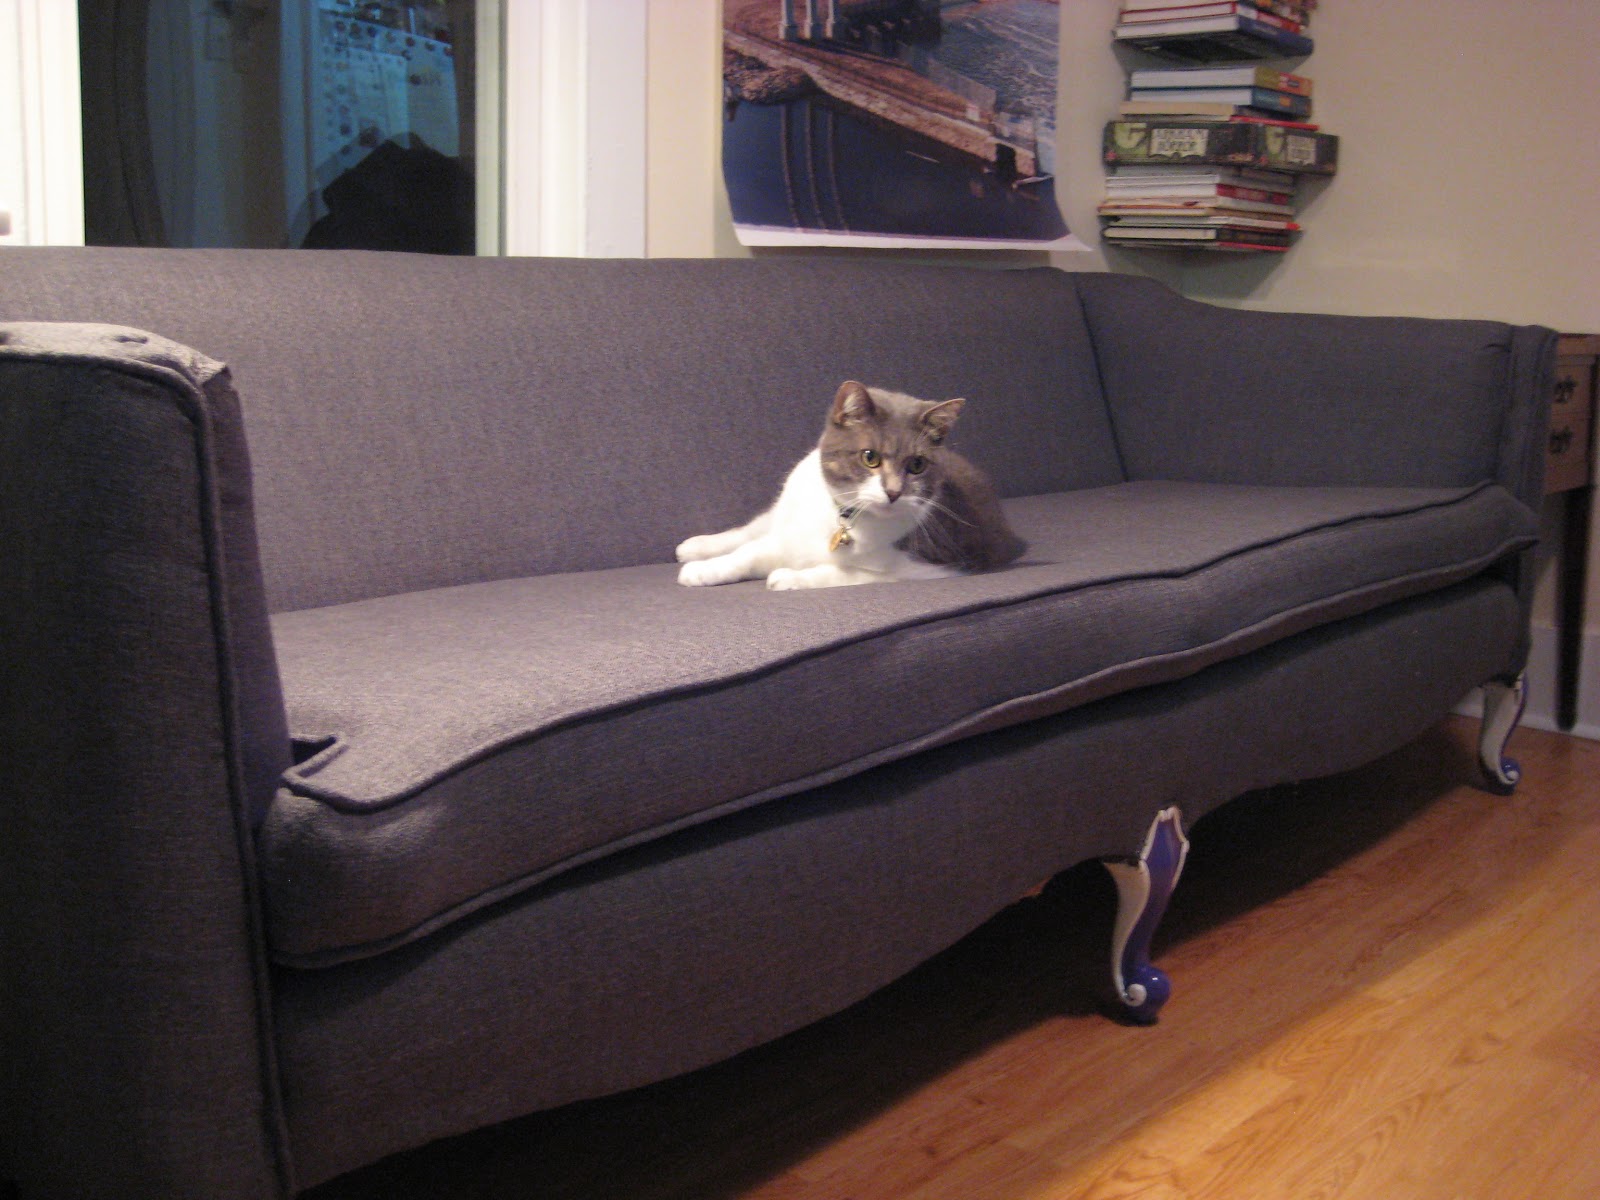
Ta-da!  There's some welting to add around the feet, the underlining to staple up, and white wooden accent pieces to nail back along the bottom, but the major work is done.  We actually finished the couch in an extended afternoon/evening.  


The interior got put in first, right over the old fabric.  That look on my face is probably consternation when our cheap electric stapler decided to stop working.  Thing learned from this project:  buy a Power-Shot brand manual stapler instead of an electric stapler.  We bought an electric staple gun several years ago for our first upholstery project because I didn't want to deal with squeezing a trigger every time I stapled, but the electric one we got was so weak that it took way more force from me than the manual stapler did in order to sink the staples properly.  My hands are still pretty sore two days later, but no blisters.


One of the other big secrets I wish I'd known when I did my first reupholstery project: you can sew your furniture closed.  Not in a slip cover way either.  In the photo above, I used a couple of staples to kind of pin the fabric in place.  In newer furniture you tear apart, you might see tack strips used in those places where you can't staple it from the inside.  I've found tack strips to be difficult to use and set properly, but with sewing, you can tack the fabric temporarily in place with staples and quickly sew it in with an upholstery needle.  


The seam is put together like a blind stitch on a hem: into the fold of one side, into the body of the other side.  the curve of the upholstery needle helps send it back out as it pushes against the wood of the frame, since you can't bend the fabric to get the needle out.  


So there you have it: a couch reupholstery in two evenings and a long afternoon.  Sewing and putting the welting around the feet (to cover the currently raw edges around them) will probably take another short evening.  J and I are both pretty sore from the pulling off of fabric, the prying of staples, and the bending and other work of stapling fabric back on.

So why reupholster a couch when we may be moving across the country in a few months?  Well, the easy answer is that we've owned this couch and the fabric to recover it for almost a year (since before we moved into our current apartment), and it was about time to get the mystery fabric put to some good use.  

But also because we're going to be here for at least another three months, and the three days it took to recover the couch is worth those three months of not looking at the old one.  If I'd known it was going to take only three days, we'd have done it sooner--I was thinking it would take a week or more, since our last two projects were five days each for armchairs.  There's also the experience value: the next couch we recover will be that much easier because we recovered this one.  And there's the defiance part: I may not know where we'll be living in six months, but by damn, I know where we're living now, and that's here.  And I'm going to make it as nice as possible in the mean time.

Friday, April 15, 2011

Too many staples


Ready?  The couch destruction went fast, only about three hours.  Maybe because this is our fourth upholstery project, maybe because we left some of the previous layers (and by some I mean a lot).  Before pulling everything off, we took out a permanent marker and wrote on each piece what it was, which side was left/right/up/down, and what order it came off.  We were going to use the old pieces as patterns for cutting out the new pieces, which we've done in the past, but this ended up not being necessary because the pieces were almost all rectangles shaped with a pleat here and there.  One thing we did this time which made it easier than previous projects: cut all the pieces much larger than necessary, then staple them down and cut back everything is stapled down.  On previous projects we cut all the pieces to exact size and then didn't have enough fabric to grab when stapling.


Part of the reason we left some of the pieces was that we found previous layers of upholstery, and it amused us to layer over it.  It's been reupholstered at least once before, which I think is a good sign of the frame's longevity (and when we opened it up, the frame, foam, belting and spring ties all looked in good shape, so we didn't have to do any tune up there.)  The oldest layer of the couch looks like it was some pink and metallic gold brocade, and without pulling everything off, it felt like the first layer might have been actually tufted instead of mock tufted like the yellow layer.  


What's tufting?  It's the buttons on the front of the couch, which usually anchor decorative pleating.  Here's what it looks like from the back.  We ultimately decided not to tuft the reupholstered version, but we took lots of photos to document things as they came off.


After getting everything stripped down as far as it was going to go, we draped everything we own in plastic and painted the legs.  


Here's the finished legs, which are maybe my favorite part of the whole couch now.  

Ultimately the legs (and the cushion) took the longest of the whole project--the drying time alone took longer than it did to rip up the couch or to recover it.  Demolition took about four hours, recovering took about eight hours, including dinner and stapler replacement breaks.  There's still some details that need to be finished, but pictures of the recovered couch will go up tomorrow.

Thursday, April 14, 2011

Tearing Apart Your Couch; Or, A Photo Essay of Madness

Blog Pictures 282

The before.  Goodbye, yellow velvet.


Blog Pictures 283

So you can see just how threadbare the velvet has gotten.


Blog Pictures 285

Strip the cushion overs off and tear them apart (we salvaged both the zippers, and used the old covers as a pattern for the new).  Gaze on your naked couch and despair.


Blog Pictures 297

Sew like mad; curse while stuffing cushions back into new cushion cover; tape off all the thread and tiny pieces of foam which got onto your new cushion cover; put cushion back on couch and appreciate.  Watch cat appreciate new couch cushion.

The couch cushion process alone took several hours; two hours to make a ton of bias strip per Colette patterns' continuous strip method; another two to sew the cording into the bias strip to make the piping.  Then a half hour to cut everything out and an hour to sew in the zippers.  Forty five minutes per side to pin the cushion surface, side fabric, and piping together, and a half hour to sew each side.  Fifteen minutes of cursing and stuffing, and voila!  Not even half way done.  But the cushion was all accomplished in a single evening.


Blog Pictures 298

And in case you're wondering what the upholstery fabric is made out of (I am), here's what the burn test looks like.  It's got a slubby, slightly shiny finish like linen, but it burns and melts like a synthetic.  No smoking on this couch!  When it lit fast than I was expecting and I dropped it into the sink, I was scared for a second when it looked like it had melted itself securely to the bottom of the sink.  (But it came off).  But cat hair doesn't stick to it, and it's already (!) been spilled on, and the liquid just beaded off, which I take as a good sign.